Phototangler is an app that allows you to create a collage with your photos. The app takes your photos and creates a transitional gradient between them, taking into account the content of the images. The outcomes are quite pleasant in a modern photo app kind of way but with some basic photoshoppping you can create your own versions of Phototangler images with a lot more control.
If you are unsure about using layer masks in Photoshop, this technique is an easy way to experiment and play with mask while creating interesting images.
For those not familiar with layer masks I will give a brief explanation, for those that are jump to the next paragraph. A layer mask can be attached to a layer to define how much can and cannot be seen on the layer. A layer mask uses two colours black and white with all the greys between to create the mask, anything on the mask which is white means that part of the layer can been seen, while black blocks the content of the layer. Depending on the darkness of the grey will mean that a percentage of the image can be seen. Layer masks can be used basically to add and subtract content form the layer and is very useful when you want to make an adjustment only t0 part of a layer.
To create a Phototangler inspired collage you need to start off with two images. For my Phototangler collage I am going to use two pictures of my cat, because the internet loves cats.
First you open the two images and place them in the same document as layers.
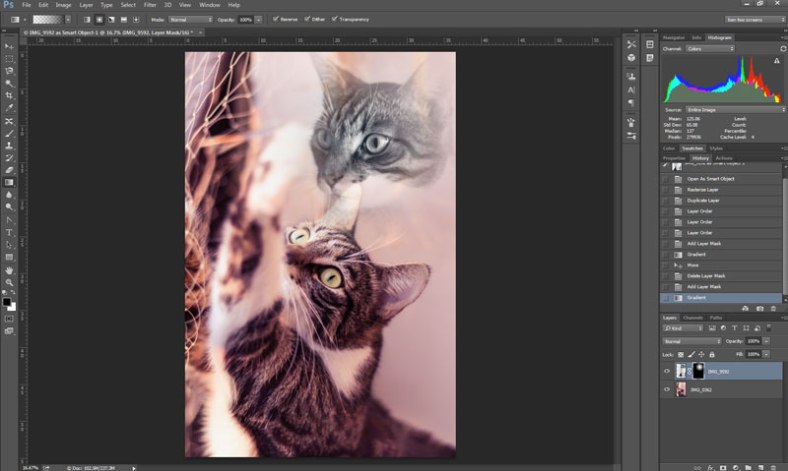
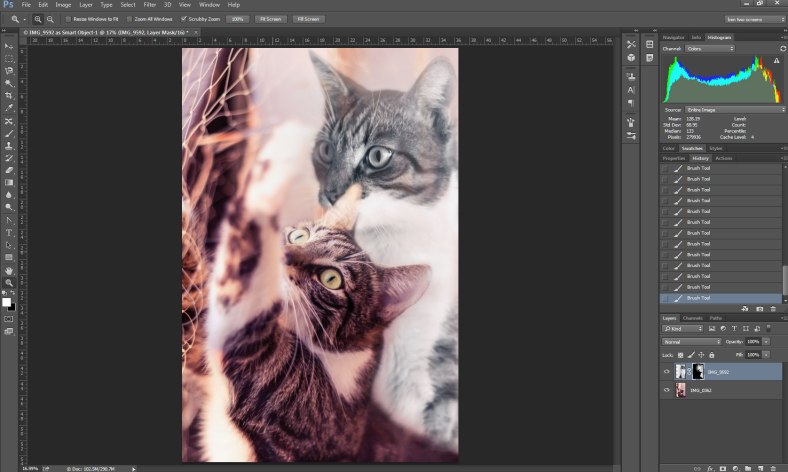
Next reposition your images so that they will look good together when combined. Add a layer mask to the top layer and use the gradient tool start masking. With my image i used the gradient tool set to a radial gradient, I drew the gradient from the centre of my cat’s head to his nose.
Using a brush with a low opacity, refine the gradient by painting white to reveal areas and black to hide areas. In my image I masked around the faces as they were the most important elements of the image.
The last part is very much experimental and the effect will depend on taste, add a texture to the image and cycle through the blending modes until something works. Generally overlay soft and hard light will work well but you will be surprised at the outcomes of other blending modes. You can find a lot of free texture resources online as well as in stock libraries. For my image I added two, one for texture and one for colour.
These collages would work well for wall art as well as holiday cards and invitations.
Below are some others that I have created while experimenting with this technique using stock images.
While I was experimenting with the stock images above my wife asked me if I could do something similar with the pictures of poppies I took recently, how could I disappoint.
Have you tired this out before or are you now inspired to give it a go, let me know what you think in the comment box below.
If you wish to get notifications when I post on my blog, you can follow me on Twitter@apertureF64, on Facebook.com/aperturesixtyfour or alternatively be emailed by subscribing below. All images are the Copyright of Benjamin Rowe , ALL RIGHTS Reserved unless credited to another photographer. For more information please read my Copyright Statement


The poppy motif on the woodgrain texture background does work well
Thanks Graham, it was the last one I worked on and so I was well in my stride and I think thats why it is my favourite.
The flowers really do hit the spot, I love them
I think the flowers and the wood panels have a similar rustic feel and work together really well as well.
Love the sofas on the forest!
It does have a nice feel to it doesn’t it.
Well, this is very cool. Thanks for telling us about it.
Love the poppies, but the Eiffel Tower also caught my eye